Hybridizing Sempervivum
May 3rd 2013
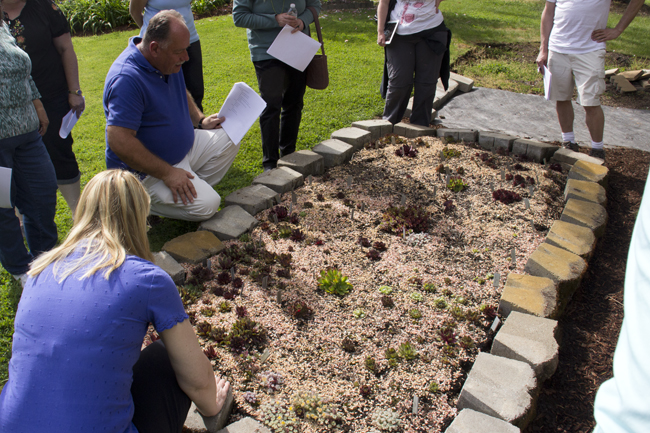
Last weekend I went to a workshop about hybridizing hens and chicks with Kevin Vaughn. Kevin is a geneticist. He has been working with hens and chicks for about 50 years. In the world of Sempervivum it was like discussing governments with John Adams and hearing him tell stories about the other founding fathers.
Hybridizers have a very unique way of looking at plants. Most of us see a plant/flower as something fixed. A red flower is a red flower. A white flower is a white flower. Hybridizers use science as their artist's brush. They look at a red flower and a white flower and think, “Could we mix those to create a red and white striped flower?”
While looking at Kevin's iris flowers I said to him, “I love the purple beard on this iris!” He responded with, “Oh, that's easy. I can slap a purple beard onto any variety you want.” It was interesting to think of plant varieties as something that can fluctuate and not as something fixed.
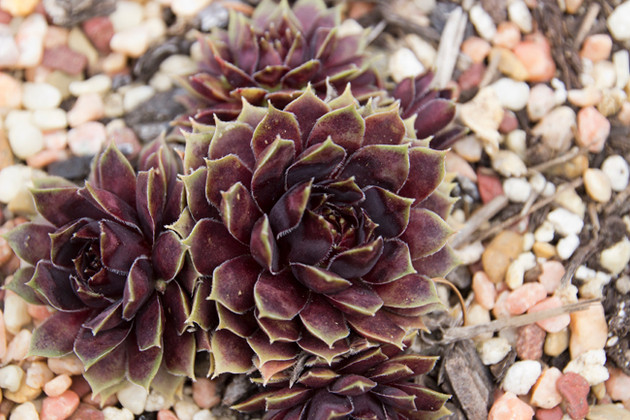
Kevin started hybridizing sempervivum when he was 9 years old. At that time there were only about 400 varieties of hens and chicks (now there are 4,000). He mixed plants with desirable traits to create many new and now well known favorites such as Emberley Pink, Hot Shot, Jungle Shadows, Lipstick and Mulberry Wine.
During the workshop, Kevin Vaughn discussed some of the sempervivum history that he's been involved in, the characteristics of semps that are used to distinguish varieties, and the process of hybridizing. Below I have included a detailed handout that was part of the clinic. It contains lots of information.
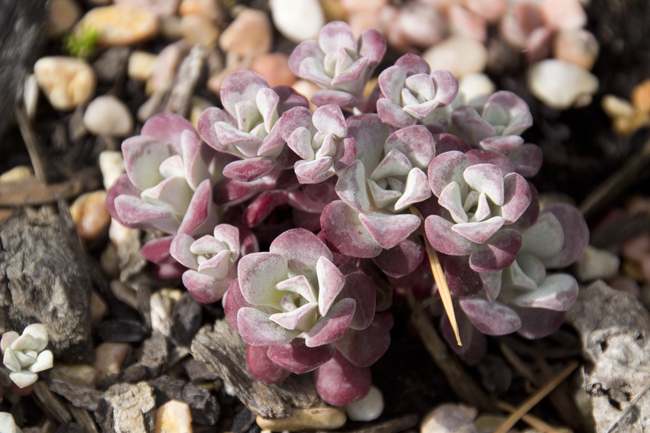
My overall take away was that a lot of the hen and chick varieties that we now have were created more or less by accident. Don't get me wrong, many are beautiful and couldn't be improved with any amount of effort. However, as true hybridizers work with sempervivum we should begin to see more unique and spectacular varieties.
Hybridizing Workshop Handout
Sempervivum History
The evaluation of Sempervivum cultivars started as an outgrowth of the so-called Dalton project in the 70's. At that time, the names of the cultivars were a total mess in the USA. Nurseries would sell the same cultivar under several names and some different plants were sold under the same name.
To straighten out the names of these cultivars, all of the major nurseries in the US that were selling Sempervivum were invited to send an example of each of their cultivars to Mrs. Bruce Crane's Sugar Hill Nursery in Dalton MA. She dedicated a large area (almost the size of a football field!) exposed to almost full sun and then put in identical planting mix and grew all the cultivars of a single name side by side so that they could be evaluated.
At that time, The Sempervivum Society in the UK was the registration authority on this group and maintained a reference collection. It was decided that these plants should be used as the standard for each cultivar even though these plants might be misnamed as well. Peter Mitchell sent pieces of approximately 300 species and cultivars to be used in the trials.
At the end of the trials, pieces of the correct plant (or an indication that their plant was correct) were sent to each cooperating nursery. In some cases, no US plant was correct and new names were given to some of these cultivars that had been distributed previously under the wrong name. Some of these had a history of wrong names that went back to Correvon's and Sanford's nurseries that were prime distributors of Sempervivum.
One other positive aspect of this identification process was that careful examination of cultivars by dissecting out the various characters would also be a good way in determining the distinctiveness of new cultivars. It was also obvious that maintaining a large collection was important in determining whether a plant was a duplicate or nearly so of an existing cultivar or something new.
At that point there were probably only around 400 cultivars available and it was still possible to grow a collection that contained virtually every cultivar. This is probably not true today! I was lucky in that Polly Bishop, who was my mentor, had almost all that were available in the US and shared this collection with me.
It was an exciting time to hybridize Sempervivum as each cross seemed to produce something of interest. A round robin that had all breeders and growers of that time was distributed to share results of crosses with each other. Members included Sandy MacPherson, Mina Colvin, Helen Payne, Patty Drown, Bill Nixon, Ed Sckrocki, Gary Gosett and myself. This was the nucleus of the Sempervivum Fancier's Association that ran for several years with Bill Nixon as editor.
Evaluation of Sempervivum Cultivars
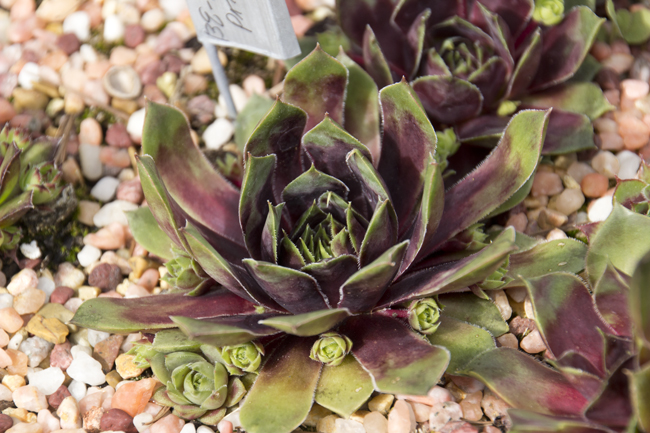
The rosette
- Overall shape (e.g., flat, upright)
- Number and width of the leaves
- Size
- Color (retention of colors, patterns, winter color)
- Texture (glabrous, ciliated, velvety, cobwebbed and tufted)
- Overall beauty
- Health (no rotting or loss of leaves in winter)
The clump
- Density of rosettes
- Length of stolons
- Rate of increase
The Flower
- Color
- Size of blooming rosette
- Frequency of bloom occurrence
Distinction
Exercises in Spring as a Hybridizer
Rowing out Seedlings
Seedlings from crosses planted in the winter should be ready to be rowed out. Generally, seedlings are grown in pots until several sets of true leaves are produced. The seedlings are planted in relatively flat seedling beds that have been covered in weed-free soil that is fairly moisture-retentive but free draining. The small plants are planted in rows, approximately 1” apart and with rows approximately 4” apart.
If the seedlings are in small clumps in the pot, it is more practical to row out clumps of small seedlings and allow them to grow for a season and pull out the selected seedlings. Separating the small plants at this early stage often causes death of the congested plants so it is better just to grow on tightly conjoined plants rather than separating them.
The seedlings are kept watered with the soil constantly moist but not sopping as they have very tiny roots. Use of a weak fertilizer such as Start N Grow or other water soluble fertilizer once/week during the growing season will increase the rate of growth of the seedlings. As the seedlings grow, add a small amount of grit or terrarium gravel to prevent moss and weed growth and to prevent soil splash up on the rosettes.

Evaluating First Year Seedlings
Using the criteria described in the evaluation scheme, number the seedlings with a distinctive number and record some information in a permanent record book. Use permanent markers to mark the seedlings. It is useful to put a brief description on the label so that you will have some idea as to the color of the plant that you numbered as a duplicate of the material in your record book. They do change dramatically!
Marking Potential Parents
In the spring, the rosettes that will bloom in the summer distinguish themselves from other rosettes by having brigher or different colors than the other rosettes in a clump and are not actively producing stolons and offsets. This is a good time to make a list of these blooming plants and to contemplate potential crosses. In your mind you should be able to envision what a combination of the two parents might appear.
For example, you might want to make a much larger cobweb type and pick out a cultivar like 'Merapi' that can approach 8” in diameter and perhaps the largest cobweb type available, perhaps 'Kraemer's Spinrad'. The seedlings from this cross may not reach your particular goal but may be a first step in that direction. Making a list of all the potential parents at this time will allow you to think about various combinations that might produce interesting seedlings. Hybridizing is a rare combination of art and science, where your tweezers are your artist's brush!
How much about chromosomes/genetics do I need to know?
The genus Sempervivum has chromosome counts that range from 34 to 108. Most species seem to be compatible with each other in the first generation.For example, my cross of S. 'Cleveland Morgan' (a red montanum type) X S. calcareum produced viable seed, but the hybrid, S. 'Greenwich Time', is sterile. Not all combinations produce sterile offspring, however. Combinations of S. tectorum, wulfenii, montanum, and arachnoideum cultivars will produce mostly viable offspring although many of these offspring have reduced seed set compared to the parents, indicating some sort of chromosomal incompatibility. For example many of the tufted varieties from cobweb X non-cobweb crosses have reduced fertility.
An exception to this statement is when two tetraploid species are crossed. Many cultivars are diploids, that is, two sets of chromosomes, but there are races of many species that have four sets and are tetraploids. These tetraploids will have a little bigger pollen under the microscope but are difficult to distinguish morphologically from diploids. That is, there are some tetraploids that are larger than the diploids but there are also some species where the diploids are larger. When two tetraploid species are crossed, the progeny get two complete sets of chromosomes from each parent and thus every chromosome has a pairing partner, leading to a fertile hybrid that is very stable. Here's an example:
Diploid arachnoideum (AA) X Diploid tectorum (TT) ---> sterile or near sterile tufted hybrid (AT)
Tetraploid arachnoideum (AAAA) X Tetraploid tectorum (TTTT) ---> fertile tufted hybrid (AATT)
It is believed that S. x nevadense is such a tetraploid X tetraploid hybrid.
In general rules of thumb in crossing, colored rosette color is dominant to green and tipped cultivars are dominant to non-tipped. Cobwebbing is semi-dominant to no cobweb so that the hybrids have tufts of cobweb to full cobweb. Size of the rosette is controlled by many genes and the progeny tend to segregate widely for these characteristics.
Often I will self pollinate a particularly unusual hybrid to see what its genetic potential is. This also allows for recovery of recessives that were present but not shown in the hybrid. Unlike many plants, there seems to be little damage from inbreeding.
Making the Crosses
Because Sempervivum are so readily crossed by insects, it is imperative that the flowers are emasculated prior to crossing. The article by Mary Mitchell describes this process in detail. I find the use of Dumont #5 tweezers is essential for the process. With these tweezers you can quickly pull off the anthers before they have dehisced their pollen. With these cutting off the petals is not necessary although with the Jovibarba group the petals do interfere with the crossing.
Here in Oregon, where summer rains are infrequent, simply covering the flowering head with a small paper bag is sufficient to dissuade pollinators. For the pollen parent, I find that bringing a small branch of the pollen parent inside the night before and placing it in a warm window will allow the flower to open and the pollen is very friable as there is no dew formation to cause clumping. Alternately, covering the pollen parent with a paper bag is also fine.
Most have bright yellow pollen and whole anthers can be picked up with the Dumont tweezers and wiped over the center of the flower where the stigmas are. After the cross is made re-cover the pod parent with the paper bag. I often repeat the pollination on the same flower as the stigma is sometimes more receptive the second day and continue to pollinate a given branch of a blooming plant. If you grow your plants in pots, you can bring the whole operation into your greenhouse or garage and do the crosses without resorting to bagging.
Alternate approaches:
- Helen Payne: volunteer selection
- Ed Skrocki: massed planting of mixed seed
- Polly Bishop: making the bees our friends
Collecting and caring for the seed heads, seed germination
Sempervivum seed is tiny and it is easy to lose it to the wind. What I found is most effective is to take the seed head and bring the seed head inside before the capsules begin to break open. These are stored in a dry cool room in individual paper bags. After the seed head is completely dry, the capsules containing your crosses or the whole seed head is gently crushed in the paper bag and the seed allowed to fall out on white paper. Capsule debris often accompanies the seed but these pieces do not seem to affect germination. I store the seed in small glassine envelopes in the crisper portion of the refrigerator. DO NOT FREEZE THE SEED! You will have dead seed.
Fill a 6-8” pot up to within an inch of the top of the pot with a good potting soil or seed starting mix. Make sure the mix is VERY WET and before planting the seed, press the surface fairly flat. Sprinkle the seed thinly across the soil surface. Do this on a WINDLESS day or go to the garage for this operation. The seed is so tiny that even a slight breeze will cause the seed to go everywhere. Depending upon the weather conditions, seedlings (cotyledons of a very even green) begin to appear in mid-March and by mid-May the seedlings will have developed several sets of true leaves.

